Art for Games Certificate (2022-2023)

In 2022-2023, I took 4 online courses from Michigan State University offered through Coursera.org. In this Art for Games specialization, I took the following courses to earn an Art for Games Certificate:
1. Pixel Art For Video Games: a pixel art course where I learned to create pixel art characters, tile sets, and animations. I used Aseprite to assist asset creation before exporting them to Unity.
2. Low Poly Art For Video Games: a 3D modeling course in which I learned the basics of 3d modeling, texturing, and animation in Maya. Models were made with a low polygon count and I also learned how to export the models and animations to Unity.
3. Current Gen 3D Game Prop Production: a high polygon modeling course in which I learned how how to make high polygon model props using references sheets and orthographic views in Maya. I then also learned how to use tools like ZBrush, Adobe Substance Painter, and Marmoset Toolbag in order to smooth out and render the completed model.
4. Concept Art for Video Games: An environmental concept art course in which I learned to block in shapes using Sketchup before exporting multiple screenshot masks to Adobe Photoshop to then paint a final concept art image.
1. Pixel Art For Video Games:
The first course I took was in Pixel Art. In it, I learned how to create and animate pixel art assets with concepts such as lighting and pixel hatching before learning how to import the art to Unity. We were given a pirate theming for the characters and setting so I took my own creative spin on it. I also learned how to create a tile set and background.
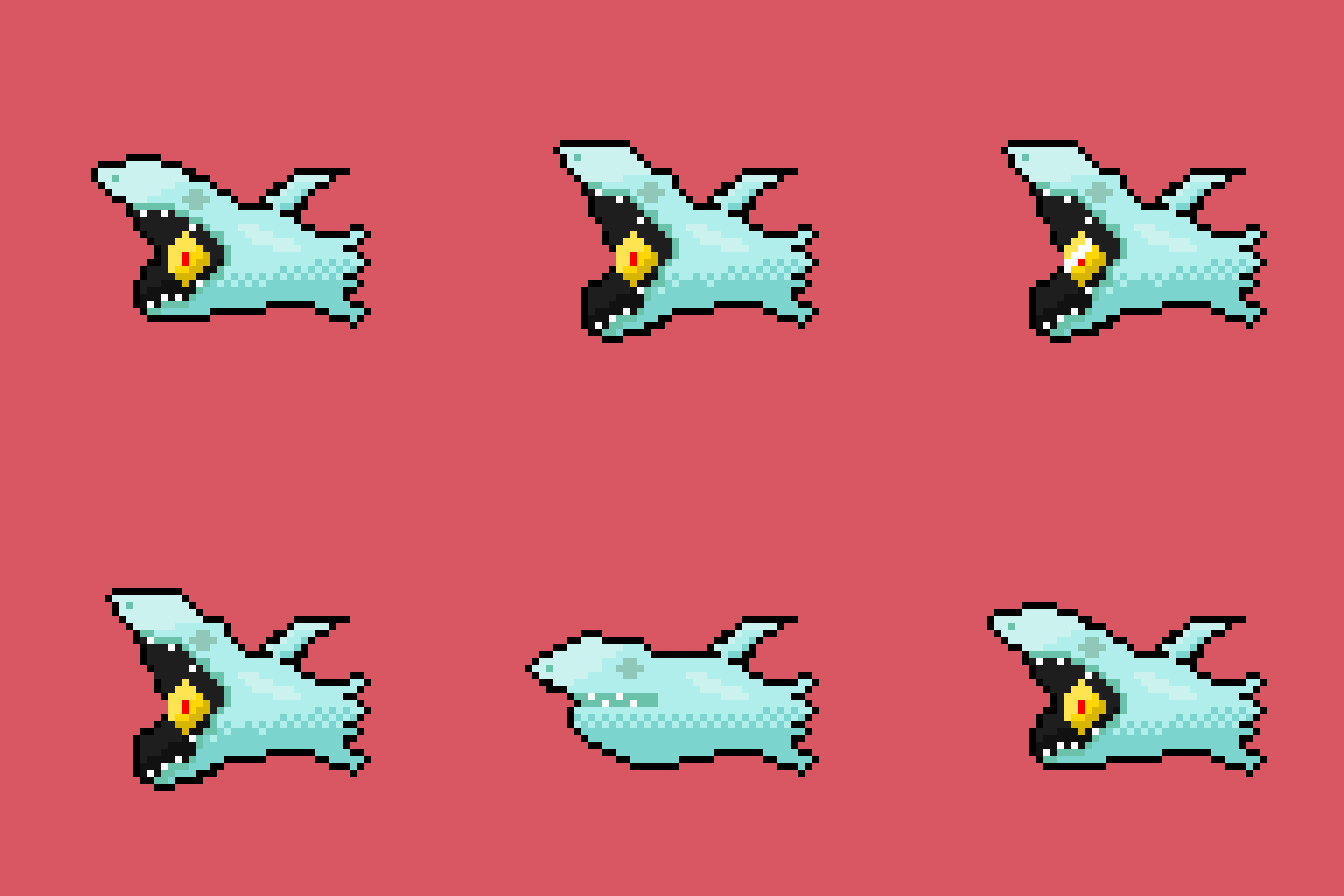
I primarily used Asesprite, a pixel art tool, to create these assets and it was very helpful in speeding up the creation process. I created a player character with a cannon as well as a couple of monstrous enemies such as a Blade Ghoul, Floating Shark Head Ghoul, and an Evil Walking Ship Helm. They each have a couple of animations such as idling or attacking.
After this, we learned how to import the assets into Unity with proper settings, and then for a bit of extra credit I made a mockup of the game in Adobe Premiere featuring all the assets put together.
Below are some examples of work I did as part of the certificate as well as the example video at the top of this page:
2. Low Poly 3D Modelling:
In the Low Poly 3D Modeling course, I learned to sculpt low poly models, texture, rig, and animate them in Maya. Above is a quick vignette of the environment I created as well as a couple of simple animations.
Starting off, I sculpted, modelled, and textured a humanoid figure based off of a character I used to draw for newspaper comics in Simon Fraser University's student newspaper The Peak.
In addition to these animations I also made various objects as practice such as a treasure chest using a lattice to warp the overall structure as well as a lamp.
The next week in the course, I then moved on to making a low poly environment. I wanted to create an island with a lot of features but actually got stuck due to software issues. This resulted in a more simple island but i decided to populate it with some basic yet interesting props.

An island with an outdoor theatre featuring some custom made chairs. Assignment was to create a simple setting for the final submission where I could place my animations for a mockup.

A low poly trophy featuring some more complex texturing with multiple colors for the stand and differently colored gems. Also take note of the newer tree models in the background.
Finally, I animated my character by rigging it in Maya using its Human Ik feature. Animations included an idle, walk, and "victory" fist bump animation that were posted above. I later also decided to make a battle stance animation for a blank character, some trees, and a custom skybox for the course's final project.
3. Current Gen 3D Prop Production:

In the Current Gen 3D Prop Production class, we were tasked on iterating on a 3D object of our choice in Maya. In the later half of the course, we then learned to use tools such as Adobe Substance Painter and Marmoset Toolbag.
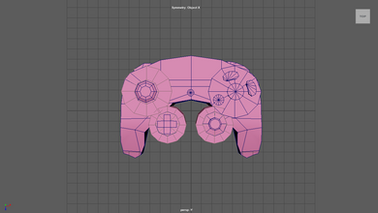
In the first section of the course, I mainly learned how to block in the initial controller dimensions using orthographic projection views. I then added sections as I slowly began to make the object fit the proper dimensions.
Object I chose was my trusty Nintendo Gamecube controller. Using top, side, and bottom views of a controller schematic, I blocked in an initial low poly controller. On the right are views of the controller from multiple angles with UV shells and the topology of the high resolution controller before texturing.
After making a low poly, mid poly, and high poly models in Maya, I then learned the basics of other tools such as ZBrush to refine the topology, Adobe Substance Painter to add texture and markings, and Marmoset Toolbag for lighting rendering.

Final controller viewed in Substance Painter with paint and texture

Final controller viewed in Marmoset Viewer

Closeup of the controller with texture on the controller as well as on the buttons to give some depth
This was one of the more difficult courses for me as I had to learn a lot of tools. Zbrush and Marmoset Toolbag were having performance issues on my computer at the time, forcing me to abbreviate some of the steps from the tutorials. The ended up with the controller still have a lot of rough edges that you would not see on a regular high poly model, but I'm still satisfied with how I took was I learned with low poly modelling and improved on it with good texturing in both Maya and Substance Painter.
4. Concept Art for Games

Final render of a mountain temple made during the course
In the Concept Art for Video Games course, I learned how to create basic scenes and architecture in SketchUp before exporting it to Photoshop. I created a scene based on the idea of a hidden shrine in a far off mountain that would serve as some kind of secret location in an open world/adventure video game. I'm a big fan of these kinds of extra areas so I thought I'd design one. I earned a certificate in concept art for completing the course.
I used both SketchUp and Photoshop to create the final render. Using SketchUp, I created various versions of the same scene with different purposes in mind. The brightly colored version, also known as a clown mask, served to allow me to quickly select objects to paint over without spilling. The line art version was for selecting smaller portions to draw over, and the grayscale version served as the basis for the shadows and general tones of the whole scene.
Below are the various versions exported from SketchUp as part of the design process:
You can find more of my digital art as well as other art on my Artstation portfolio here:


